Baked Split Chicken Breast Best Recipes
Baked Split Chicken Breast
Imagine walking into your kitchen and smelling a warm, savory roast — the unmistakable aroma of a perfectly cooked, bonein chicken breast. That scent promises a comforting, flavorful meal and the kind of dinner that brings people together.
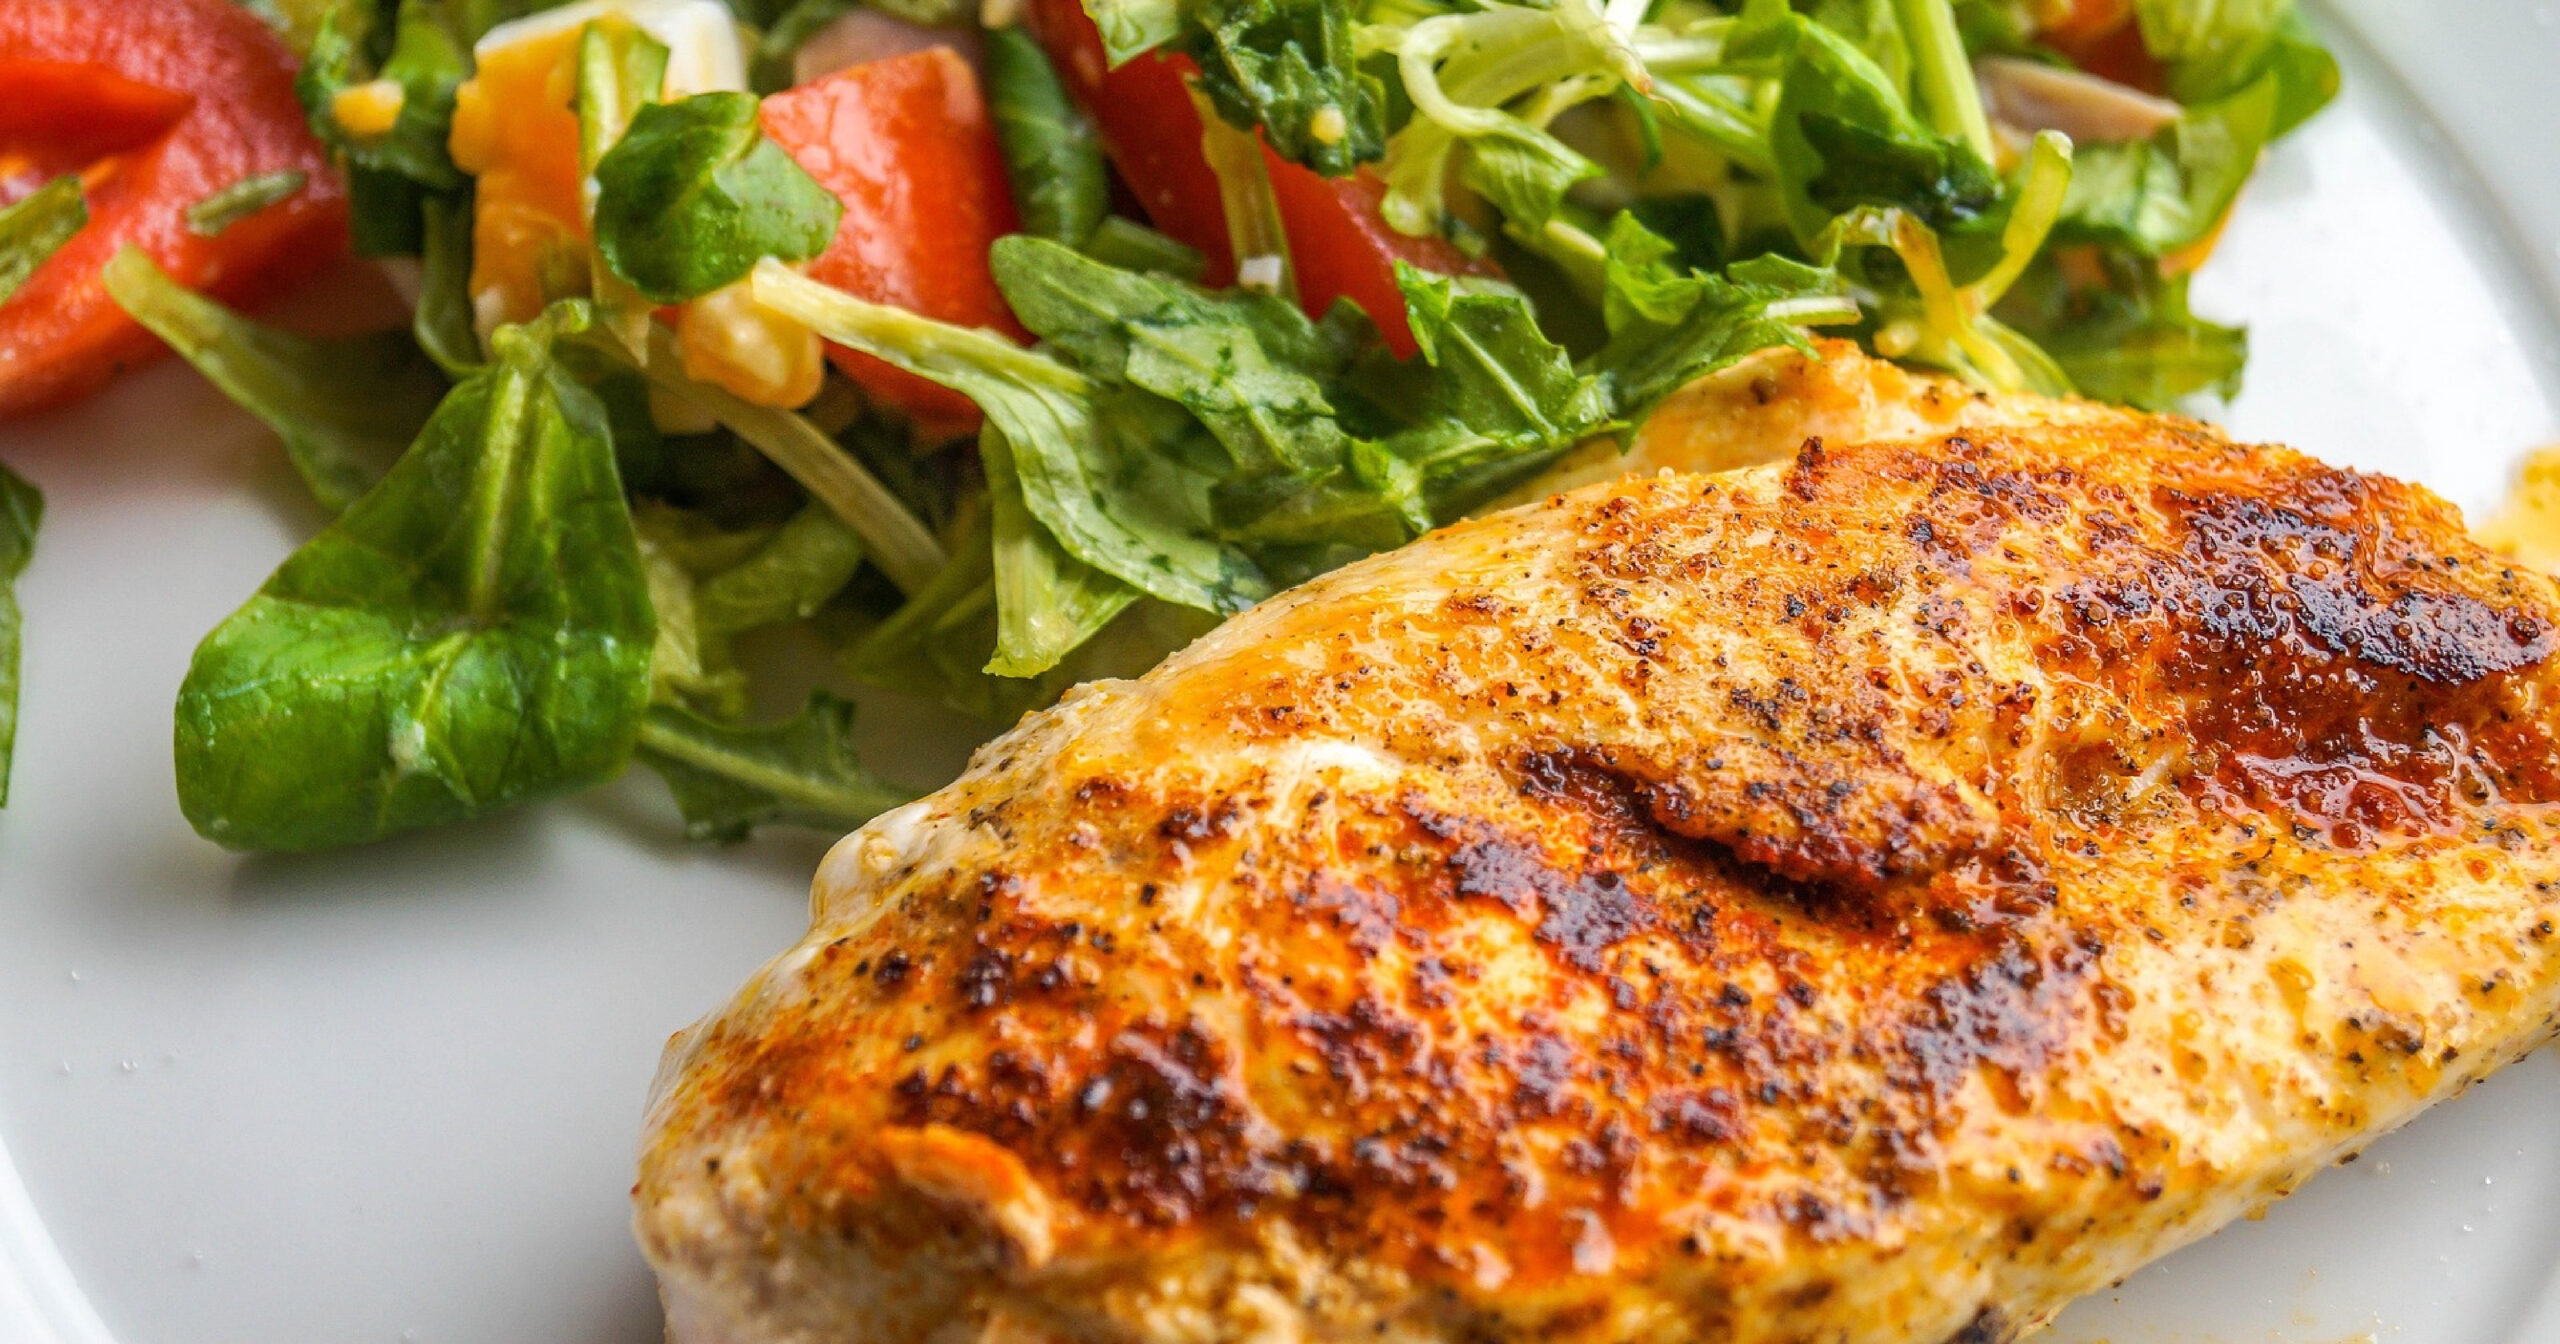
Baked split chicken breast is an easy way for home cooks to elevate weeknight meals. A split cut (bone-in, skin-on breast split down the keel bone) holds more flavor and moisture than a boneless breast, and it takes seasonings and simple techniques exceptionally well.
Key Takeaways
- Split chicken breasts tend to deliver richer flavor and juicier meat than boneless options
- Bone-in, skin-on chicken preserves moisture and crisps beautifully when baked
- Layered seasoning and proper technique make a big difference for roasted split chicken
- Controlling oven temperature and checking internal heat ensures consistently juicy results
- Versatile baked split chicken breast works with countless recipes and flavor profiles for any meal
Whether you’re new to cooking or comfortable in the kitchen, this guide will teach you how to bake split chicken breast with dependable results — crispy skin, juicy meat, and flavorful seasoning. Jump to the recipe (metric conversions included) or keep reading for tips, times, and seasoning ideas.
Understanding Split Chicken Breasts: Benefits and Selection
Creating a juicy split chicken recipe starts with knowing exactly what a Baked Split Chicken Breast is and why cooks prefer it. A split breast is a bone-in, skin-on chicken breast cut down the keel bone so each half includes part of the rib and the wing joint — think of it as a single breast quarter rather than a boneless fillet. That structure helps the meat stay moist and carry flavor better than many boneless breasts.
What Makes Split Chicken Breasts Unique
Split chicken breasts differ from other cuts in several useful ways:
- Bone-in design that helps retain natural juices during cooking (the bone conducts heat and protects meat from drying)
- Skin-on surface that crisps and adds concentrated flavor when baked or roasted
- Often more economical per serving than trimmed boneless breasts
- High in protein with a bit more fat when the skin is left on, which adds mouthfeel and richness
Selecting Quality Bone-in Chicken
When shopping for split chicken breasts, look for these signs of freshness and quality:
| Quality IndicatorWhat to Look For | |
| Color | Even pink-white color without gray or greenish spots |
| Texture | Firm and slightly springy, not slimy or dry |
| Packaging | Well-sealed with minimal liquid in the tray — excess liquid can indicate older product |
Benefits of Cooking with Skin-on Chicken
Cooking with Baked Split Chicken Breast generally yields juicier, more flavorful results. The skin helps lock in moisture and creates a crisp exterior that contrasts with tender meat inside. If you’re watching calories, remove the skin after cooking or enjoy it in moderation — the cut still provides a substantial protein serving compared with many other meat choices.
Essential Ingredients and Equipment for Perfect Results
To make a reliable, flavorful Baked Split Chicken Breast, start with quality ingredients and the right tools. Choosing the best items up front makes a seasoned split chicken breast sing and helps you hit consistent results every time.
Here are the key ingredients to keep on hand (use amounts in the recipe card later):
- Fresh bone-in split chicken breasts (about 10–16 oz / 280–450 g each)
- Extra virgin olive oil — or a higher smoke-point oil (avocado or light olive oil) for very high heat
- Kosher salt and freshly ground black pepper
- Fresh herbs such as rosemary, thyme, and basil
- Garlic cloves (2–4, minced) and lemon for zesting and juicing
The right tools make the job easier and more precise. If you don’t have one of these, see the alternatives in parentheses:
| EquipmentPurpose | |
| Ceramic or glass baking dish (or rimmed baking sheet + wire rack) | Ensures even heat and allows air circulation under the chicken |
| Instant-read meat thermometer | Guarantees perfect internal temperature (essential for food safety) |
| Sharp kitchen knife | For trimming, butterflying, and chopping herbs |
| Mixing bowls | For marinades, rubs, and compound butter |
Pro tip: Keep a small bottle of extra olive oil and kosher salt in your pantry for everyday seasoning. If you plan to roast at 425°F (218°C) or use a high broil, consider oils with higher smoke points. A good instant-read thermometer is the single best tool to prevent dry meat.
Basic Baked Split Chicken Breast Recipe
Making an easy split chicken dinner is straightforward and reliable when you follow a few simple steps. This recipe delivers crispy skin, juicy meat, and a dinner that fits weeknights or company nights alike.
Prep well and follow the timing below—the difference between dry and juicy Baked Split Chicken Breast is mostly preparation and accurate temperature control.
Preparation Steps
Follow these numbered steps before the chicken goes into the oven:
- Remove chicken from the fridge 30 minutes before cooking to take the chill off (safe if total sitting time is under 2 hours)
- Pat each chicken breast dry with paper towels to help the skin crisp
- Trim any excess fat or remaining feather quills and check for extra skin flaps
- Place chicken on a clean cutting board and season immediately
Seasoning Techniques
Simple seasoning highlights the chicken’s flavor. For a basic rub try this approach:
- Drizzle each breast with olive oil (about 1 tsp / 5 mL each)
- Sprinkle kosher salt (about 1 tsp per 1–1.5 lb / 450–700 g of chicken) and freshly ground black pepper
- Pat on dried herbs such as thyme or rosemary, or use 1–2 tsp of a mixed seasoning
- Rub the seasonings into the skin and, if possible, under the skin for deeper flavor
Cooking Temperature and Timing
Use these settings as a guideline; actual time depends on the size of each split breast (see note below):
- Preheat oven to 375°F (190°C) for moderate roasting; for a quicker roast you can use 425°F (218°C) but monitor closely
- Place chicken on a baking sheet with a wire rack (or in a rimmed baking sheet) so air circulates under the breast
- Bake 35–55 minutes depending on size — smaller split breasts (about 10 oz / 280 g) tend to finish nearer 35–40 minutes, larger pieces (14–16 oz / 400–450 g) can require 50–55 minutes
- Check doneness with an instant-read thermometer: the thickest part should reach 165°F (74°C)
Pro tip: Let chicken rest 5–10 minutes after removing from the oven so juices redistribute. Use an instant-read thermometer to avoid overcooking and to hit perfect, juicy results every time.
Mastering the Perfect Seasoning Blend
Creating a delicious, seasoned Baked Split Chicken Breast starts with a simple, well-balanced spice mix and the habit of layering flavors. The right blend highlights the chicken’s natural taste while adding complexity to each bite.
Begin with this easy measured seasoning you can use on one large split breast (or two smaller halves):
- Kosher salt — 1 tsp (5 g)
- Garlic powder — 1/2 tsp (2.5 g)
- Onion powder — 1/2 tsp (2.5 g)
- Fresh ground black pepper — 1/4 tsp (1 g)
- Dried thyme or rosemary — 1/2 tsp (1–2 g)
Layering tip: pat the chicken dry, rub with a thin coat of olive oil, then press the seasoning into the skin and under the skin where possible. This helps the flavors penetrate and creates an herb-crusted surface when baked.
Want bolder flavors? Try one of these variations:
- Cajun: add 1/2 tsp paprika + 1/4 tsp cayenne for heat
- Smoky: swap smoked paprika for regular paprika and add 1/4 tsp cumin
- Mediterranean: add 1 tsp dried oregano + lemon zest and fresh parsley after cooking
If you have time, salt the chicken up to 24 hours ahead (refrigerate uncovered or loosely covered) — this dry-brining improves seasoning penetration and helps the skin crisp. Remember to adjust salt if you brine or use a salty marinade.
“The secret to a memorable herb-crusted chicken breast is balanced seasonings and layering them under and over the skin.”
Temperature Guide and Cooking Times for Juicy Results
To nail a juicy Baked Split Chicken Breast recipe, be precise with oven settings and cook times. Temperatures and time vary by oven type and the weight of each split breast, so use the guidance below and confirm doneness with an instant-read thermometer.
Different ovens behave differently — convection ovens circulate air and cook faster, while conventional ovens are a bit slower but still reliable.
Oven Settings for Optimal Cooking
Use these starting points and adjust based on breast size:
- Conventional oven: preheat oven to 425°F (218°C) for a faster roast or 375°F (190°C) for a gentler bake
- Convection oven: reduce temperature by about 25°F (15°C) (so 400°F / 205°C is a common convection setting if you’d use 425°F conventional)
- Estimated cooking time window: 35–55 minutes depending on piece size and oven — see weight-based guidance below
Weight-to-Time Guide (Approximate)
Use these rough targets per split breast (remove variability by using a thermometer):
- 10–12 oz (280–340 g): 35–40 minutes at 375–425°F (190–218°C)
- 12–14 oz (340–400 g): 40–50 minutes
- 14–16 oz (400–450 g): 50–55+ minutes
Internal Temperature Guidelines
Food safety first — the USDA recommends a safe internal temperature of 165°F (74°C) for poultry. Measure at the thickest part of the breast, avoiding contact with bone (bone will give a falsely high reading if touched).
- Insert the instant-read thermometer horizontally into the thickest part of the meat
- Confirm the thermometer reads 165°F (74°C) before removing from the oven
- If close but not there, return to oven and recheck after 5–7 minutes
Resting and Serving Tips
After cooking, let the chicken rest 5–10 minutes under loose foil. Resting lets juices redistribute and gives a more tender slice. Don’t wrap tightly — that will steam the skin and reduce crispness.
Pro tip: If you want crisper skin after resting, a 1–2 minute blast under the broiler (watch closely) will re-crisp without substantially raising internal temperature.
Herb-Crusted Split Chicken Breast with Roasted Vegetables
Elevate dinner with an elegant yet approachable herb-crusted chicken breast. This version uses an herb butter under the skin and roasted vegetables around the bird for a single-pan meal that looks special but is easy to make.
Ingredients (per 1–2 split breasts):
- Unsalted butter — 2 tbsp (30 g), softened
- Fresh rosemary — 1 tsp, finely chopped
- Fresh thyme leaves — 1 tsp
- Chopped parsley — 1 tbsp
- Minced garlic — 1 clove
- Salt and pepper to taste
- Fingerling potatoes — 10–12 oz (300–350 g), halved
- Shallots — 2–3 small, halved
Make the herb butter: mix softened butter with rosemary, thyme, parsley, and minced garlic. Gently separate the skin from the meat of the Baked Split Chicken Breast and spread the herb butter under the skin and a little on top. This keeps the meat moist and creates a fragrant crust when roasted.
Vegetable timing: toss potatoes and shallots with a little olive oil, salt, and pepper and arrange them around the chicken in the roasting pan or rimmed pan. If your veg pieces are large, par-cook potatoes for 10 minutes in boiling water or microwave 3–4 minutes so they finish at the same time as the chicken.
Cooking steps and timing:
- Preheat the oven to 400°F (205°C).
- Place the prepared split chicken in a roasting pan or rimmed baking sheet with a wire rack if you have one.
- Arrange the seasoned vegetables around the chicken.
- Roast for approximately 45–55 minutes, depending on breast size — check the thickest part with an instant-read thermometer; it should read 165°F (74°C).
Your herb-crusted chicken will come out with crispy, golden skin and juicy meat. Let rest 5–10 minutes before slicing. Serve directly from the pan with the roasted potatoes and shallots — a simple green salad or steamed green beans make an easy side, and a light white wine like Sauvignon Blanc pairs nicely with the herbal notes.
Tips for Achieving Crispy Skin and Juicy Meat
Great texture comes from a few focused habits: dry skin, even seasoning, accurate temperature, and brief resting. Follow these practical tips to get a crispy exterior and tender, juicy meat every time.
Pre-Cooking Preparation Techniques
Prep is where you win or lose crispiness. Try these steps:
- Pat the chicken skin very dry with paper towels — moisture is the enemy of crispness.
- For extra-crispy skin, air-dry uncovered in the fridge for 1–4 hours if time allows (safe when total unrefrigerated time stays under 2 hours).
- Bring the chicken out of the fridge about 30 minutes before cooking so it cooks more evenly.
- Season generously with kosher salt and pepper and brush a light coat of olive oil to help the skin brown.
Basting and Monitoring Strategies
Keep an eye on the bird but don’t overwork it. These techniques help maintain moisture and promote even browning:
| TechniquePurposeRecommended Frequency / Notes | ||
| Basting with butter or pan juices | Adds flavor and surface moisture for browning | Optional — every 15–25 minutes if using lower oven temps |
| Using a rack in the baking tray | Promotes air circulation for even crisping | Keep rack in place for the entire cook |
| Internal temperature checks | Ensures safe doneness without overcooking | Use an instant-read thermometer near the end of cook time; avoid touching bone |
Don’ts: avoid covering the chicken tightly while baking (this steams the skin), and don’t slice immediately — resting 5–10 minutes preserves juices. If you want extra crisp after resting, give the skin a quick 1–2 minute broil (watch closely to prevent burning).
Storage and Leftover Ideas
Making extra of your easy split chicken dinner is smart—leftovers save time and stretch the value of a meal. Proper storage keeps your healthy baked chicken breast safe and delicious for future dishes.
Storage basics:
- Refrigerate cooked chicken in an airtight container within 2 hours of cooking
- Keep in the fridge for 3–4 days (USDA guidance)
- Freeze for best quality up to 3–4 months; vacuum-seal or wrap tightly to prevent freezer burn
When reheating, the goal is to restore warmth without drying the meat—always reheat to an internal temperature of 165°F (74°C) for safety.
Reheating methods:
- Oven: cover loosely with foil and warm at 350°F (175°C) for 10–15 minutes (depending on portion size) until 165°F internally
- Skillet: add a splash of chicken broth or water and warm over medium-low heat, covered, until heated through
- Microwave: use 50% power and short intervals, stirring or turning pieces to heat evenly; check temperature
Leftover meal ideas (serves 2–4 depending on portion):
- Shred chicken for a quick chicken salad or creamy chicken sandwiches
- Slice for hearty salad toppers or grain bowls
- Chop and use in quesadillas, pasta, or fried rice for a fast weeknight meal
Leftovers are a great source of lean protein for lunches and second meals—label containers with the date to keep track of time in storage, and discard if beyond recommended limits.
Conclusion
Mastering how to bake a split chicken breast gives you a dependable, flavorful option for weeknight dinners and special occasions alike. You’ve learned the essentials — choosing bone-in, skin-on cuts, seasoning and layering flavors, and controlling oven temperature to get juicy meat and crispy skin.
Quick checklist: Prep time ~15–20 minutes, cook time 35–55 minutes (depending on breast size), serves 2–4. Use an instant-read thermometer to hit 165°F (74°C) for safe, repeatable results.
Now that you have the basics, experiment with herbs, spice blends, and cooking methods — from a simple baked split chicken breast to herb-crusted roasted variations. Try the recipe card, print the steps, or save this page for your next meal.
FAQ
What are split chicken breasts?
Split chicken breasts are bone-in, skin-on breast halves cut down the keel bone so each piece includes part of the rib and the wing joint. Because they keep the bone and skin, they tend to stay juicier and develop more flavor than boneless, skinless breasts.
How long should I bake split chicken breasts?
Use 375–425°F (190–218°C) depending on whether you want a gentler bake or a quicker roast. Expect about 35–55 minutes in the oven—smaller pieces finish nearer 35–40 minutes, larger split breasts can take 50–55 minutes. Always verify doneness with an instant-read thermometer; the internal temperature should be 165°F (74°C).
Is it better to cook split chicken breasts with the skin on or off?
Cook them with the skin on when possible. The skin helps lock in juices and crisps nicely under high heat, giving better texture and flavor. If you prefer fewer calories, you can remove the skin after cooking.
What are the best seasonings for split chicken breasts?
Classic seasonings are kosher salt, black pepper, garlic powder, paprika, and herbs like thyme or rosemary. For variations try Mediterranean blends (oregano, lemon zest) or Cajun-style spices (paprika, cayenne). Layer flavors under the skin and on top for the best results.
How do I keep split chicken breasts juicy when baking?
Pat the chicken dry, season well, and use bone-in, skin-on cuts. Cook to an internal temperature of 165°F (74°C) and let the meat rest 5–10 minutes before slicing so juices redistribute. Using an instant-read thermometer prevents overcooking.
Can I prepare split chicken breasts ahead of time?
Yes — you can season or dry-brine them up to 24 hours ahead and keep them refrigerated. Bring them close to room temperature (about 20–30 minutes) before cooking for more even results, but avoid leaving raw poultry out for longer than 2 hours in total.
What internal temperature indicates a fully cooked split chicken breast?
The USDA recommends an internal temperature of 165°F (74°C) for poultry. Insert an instant-read thermometer into the thickest part of the breast without touching bone to get an accurate reading.
How should I store leftover baked split chicken breasts?
Store leftovers in an airtight container in the refrigerator for 3–4 days. For longer storage, freeze for best quality up to 3–4 months (wrap tightly or vacuum-seal). When reheating, heat to 165°F (74°C) before serving.
What’s the difference between baking and roasting split chicken breasts?
“Baking” often implies lower temperatures and a covered dish, while “roasting” usually uses higher heat and more direct exposure. In practice for split chicken breasts, both terms are used interchangeably—425°F (218°C) is a common roasting temperature while 375°F (190°C) is a gentler bake.
Can I use frozen split chicken breasts?
Thaw frozen split breasts overnight in the refrigerator for best results. If you must cook from frozen, expect significantly longer cook times (often ~50% longer) and confirm the internal temperature reaches 165°F (74°C). Thawing first provides more even cooking and better texture.